5/2/2020 Administrator
Installing Blazor-Blogs on Microsoft Azure (Manual Method)
Also see: Installing Blazor-Blogs on Microsoft Azure (Deploy To Azure Button Method)
Requirements:
-
A Microsoft Azure Account (you can create one at this link: https://azure.microsoft.com/en-us/free/
Set Up Azure SQL Database
Log into the Microsoft Azure portal at: https://portal.azure.com
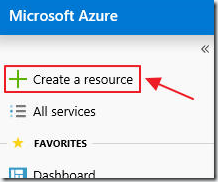
Click Create a resource.
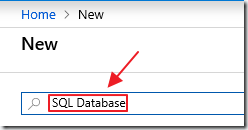
Enter SQL Database and press the Enter key to initiate a search.
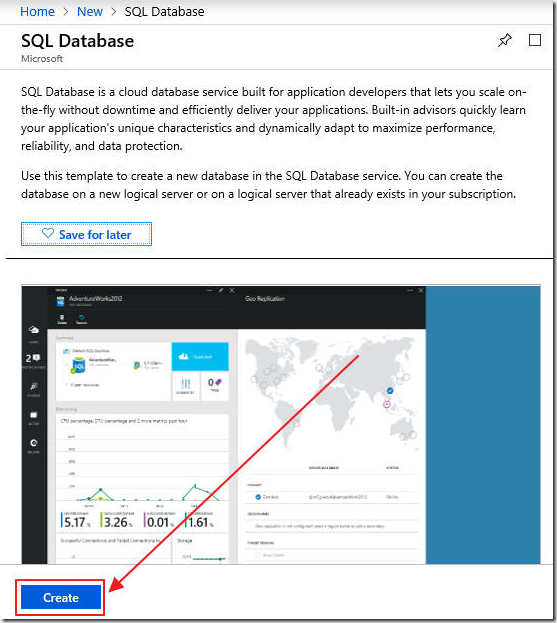
Click the Create button.
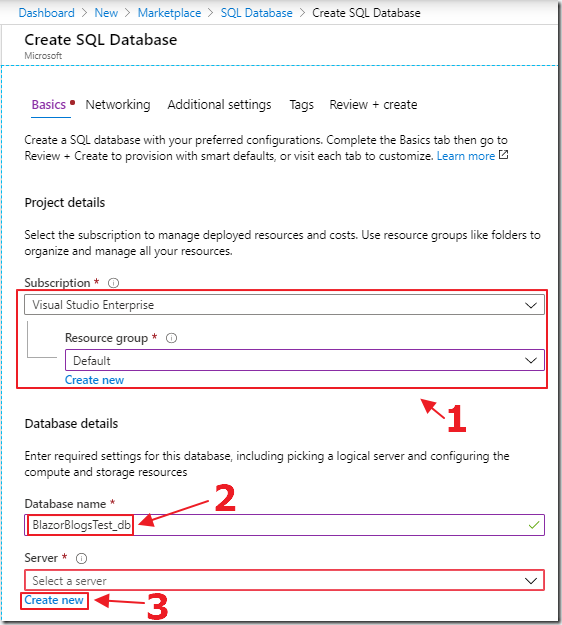
Fill in the required fields.
If you have an existing Azure SQL Server to host the database you can select it.
Otherwise click the Create new link next to Server.
Note: You will need to note the Database name to use in the Installation Wizard in the later steps.
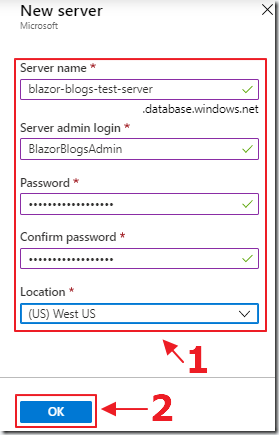
Fill in the information and click the OK button.
Note: You will need to note the server name (including the .database.windows.net part), the username and the password to use in the Installation Wizard in the later steps.
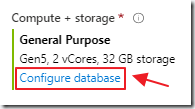
This will return you to the main SQL Server blade.
Click the Configure database button.
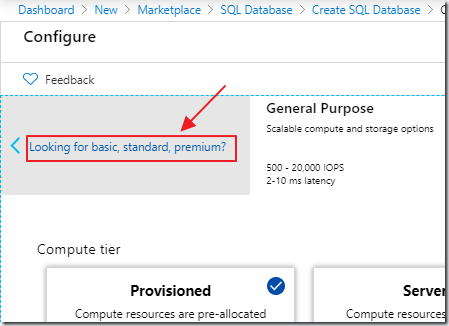
Select the Standard section (Blazor-Blogs does not require a powerful database for the average sized web traffic).
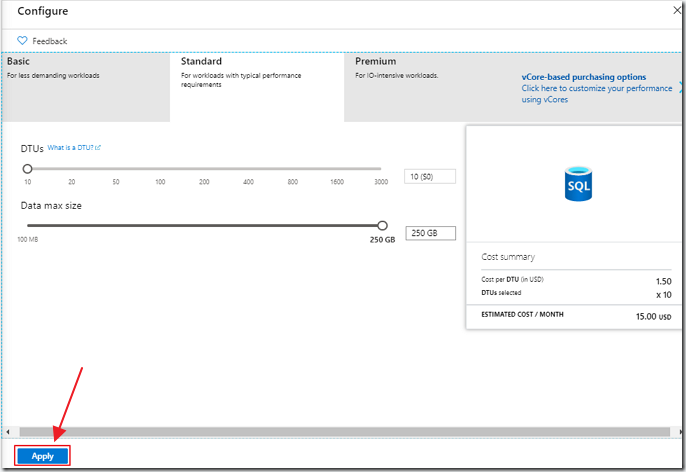
Select the size, ensure you note the estimated monthly cost, and click Apply.

Click the Review + create button.
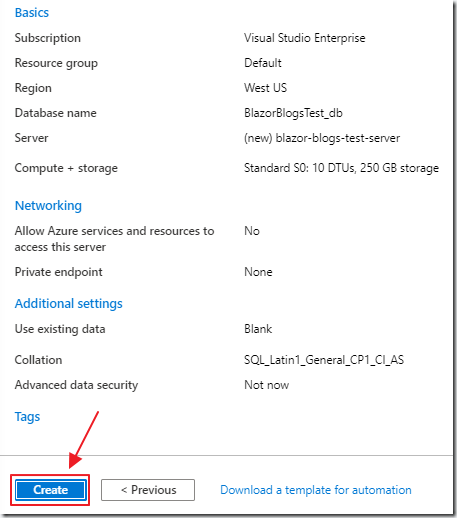
Finally click the Create button.

You will need to open up the firewall on the database to allow the Azure web app (created in the later steps), to access it.
When the server is created, in the Azure portal, open the Server configuration (not the Database) and click Show firewall settings.
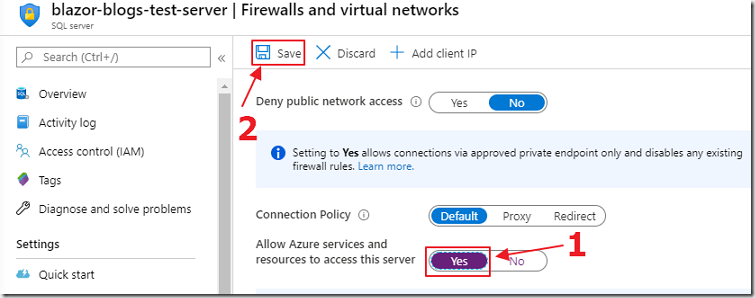
Enable: Allow Azure services and resources to access this server
Click the Save button.
Set Up The Azure Website
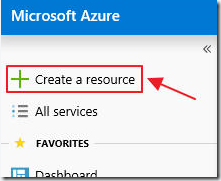
Select Create a resource.
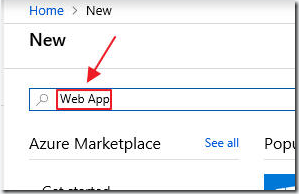
Enter Web App and press the Enter key to initiate a search.
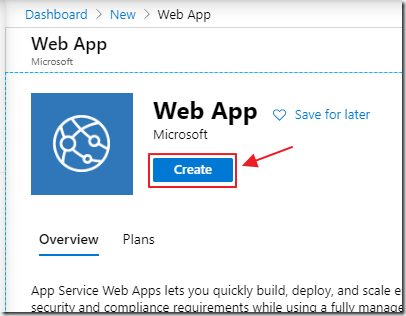
Click the Create button.
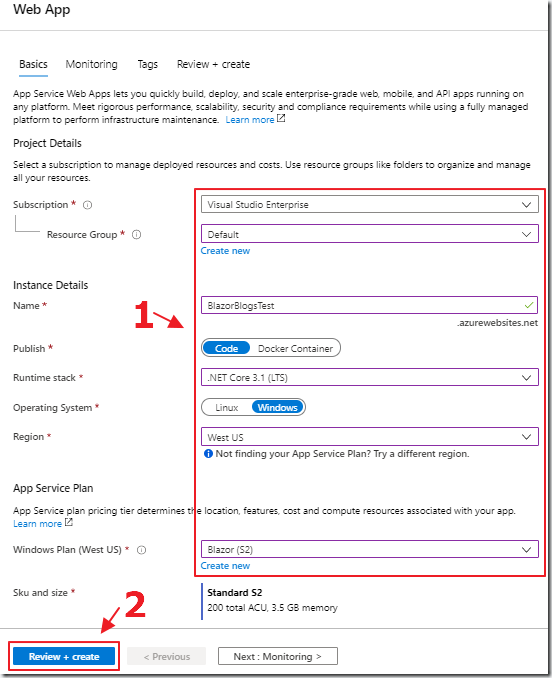
Fill in the required fields and click the Review + create button.
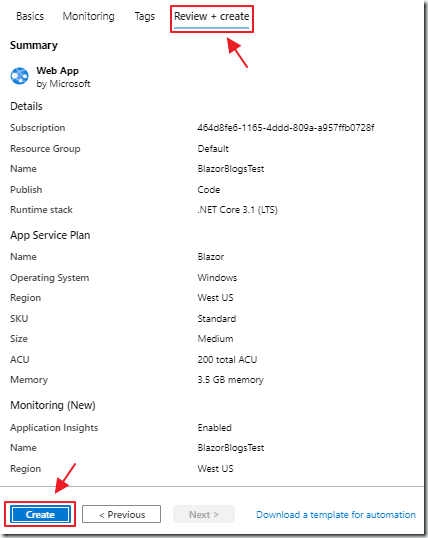
On the Review + create tab, click the Create button.

It may take some time for Azure to create and deploy the Web App.
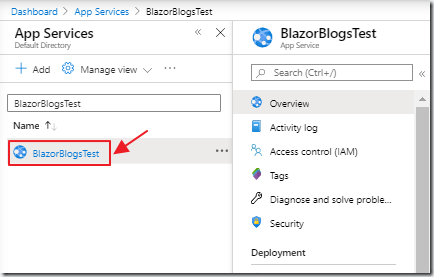
When it is ready, it will display in the App Services section in the Azure Portal.
Click on it to select it.
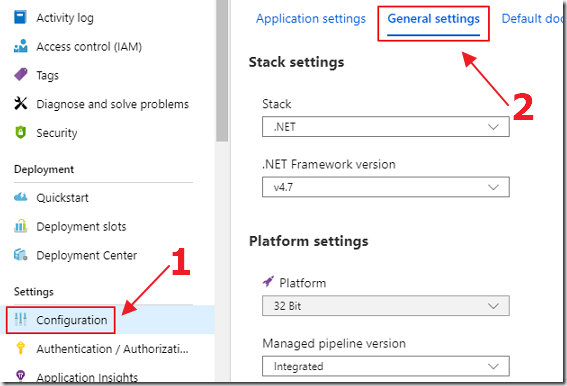
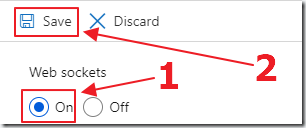
Enable Web Sockets in Configuration.
Deploy The Code
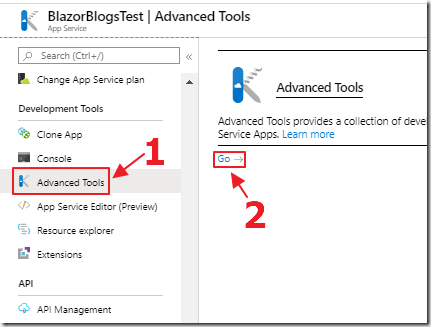
In the Development Tools section, select Advanced Tools, then select Go.
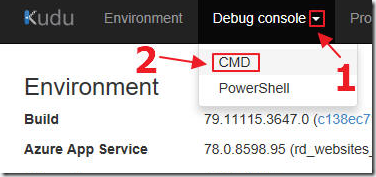
When the Kudu window opens, from the Debug console menu, select CMD.
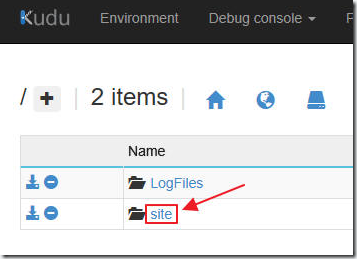
Select site.
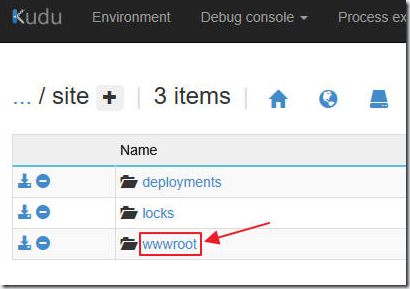
Then select wwwroot.
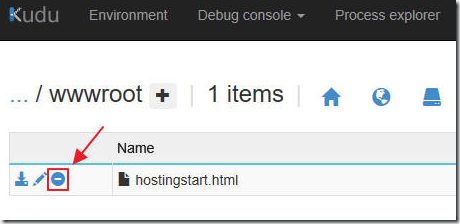
In the wwwroot folder, click the delete button to delete any files already there.
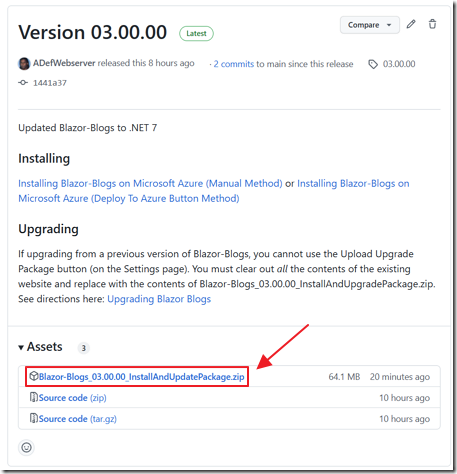
Download the installation _InstallAndUpdatePackage.zip file from the Blazor-Blogs Releases page (https://github.com/ADefWebserver/Blazor-Blogs/releases).
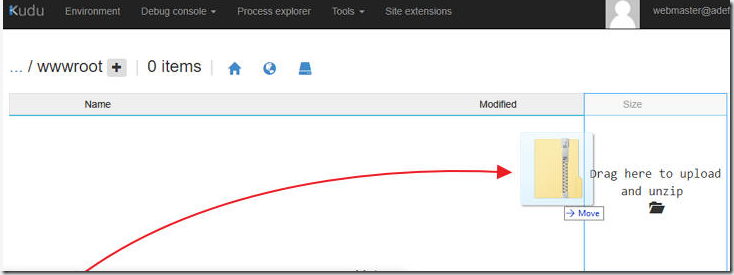
Drag that file onto the web browser window until you see the box that says: Drag here to upload and unzip.
Release your finger on your mouse to drop the .zip file in that box.

The file will be uploaded and unzipped.
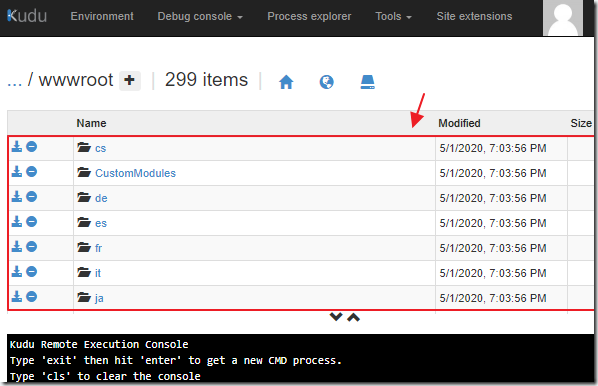
When the process is complete the pages will display.
Note: If you have any issues, you can also deploy the files to the wwwroot directory using other methods such as FTP.
Install Wizard
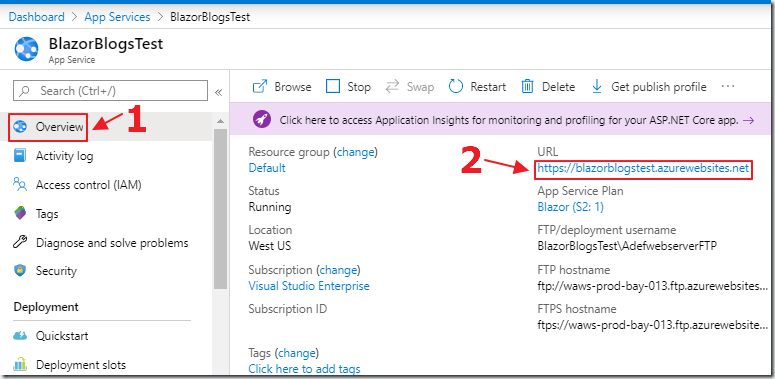
Return to the main Azure Portal window.
Select the Web App, then Overview, then click the URL link to navigate to the website.
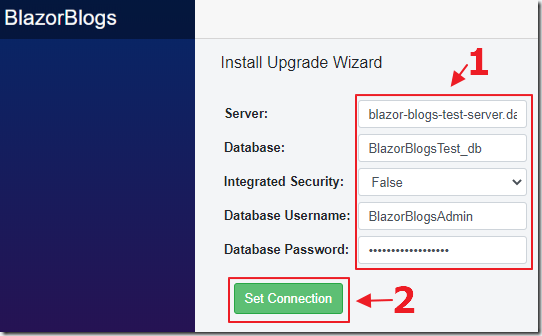
You will see the Installation Wizard.
(it may take a long time to load)
Enter the values you noted from the earlier steps, and click the Set Connection button.
Note:
- If you have a problem connecting to the database in Azure, ensure you enabled the firewall access in the earlier steps and see: https://docs.microsoft.com/en-us/azure/sql-database/sql-database-manage-logins
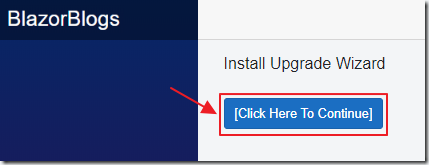
The scripts will run to create the database objects.
When they are complete, click the Click Here To Continue button.
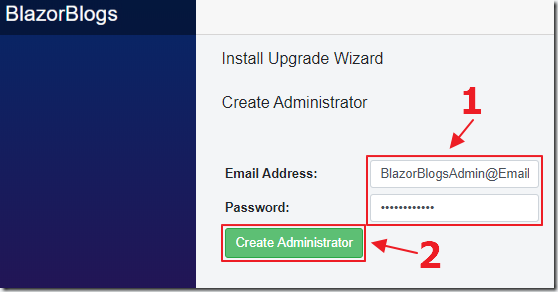
Enter the information for an Administrator account.
Note: Ensure the Password entered is a strong password (8 characters with an upper and lower case character and a non alphanumeric character).
Click the Create Administrator button.
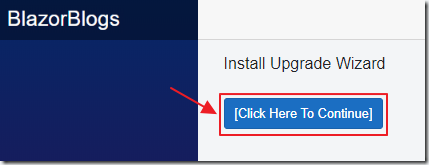
When the account is created, click the Click Here To Continue button.
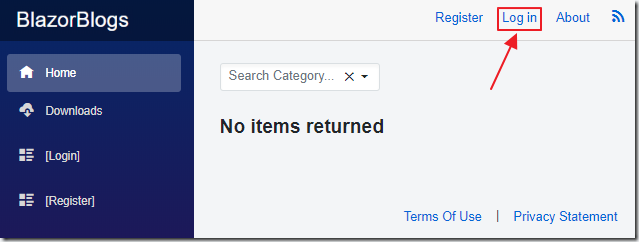
The site will show.
Click the Log in button.
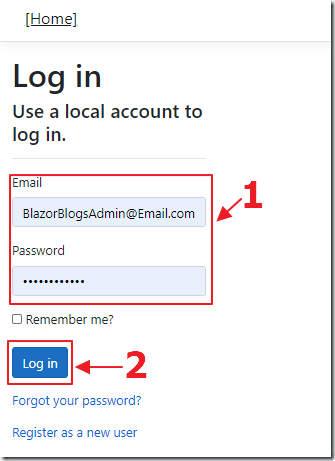
Log in with the Administrator account.
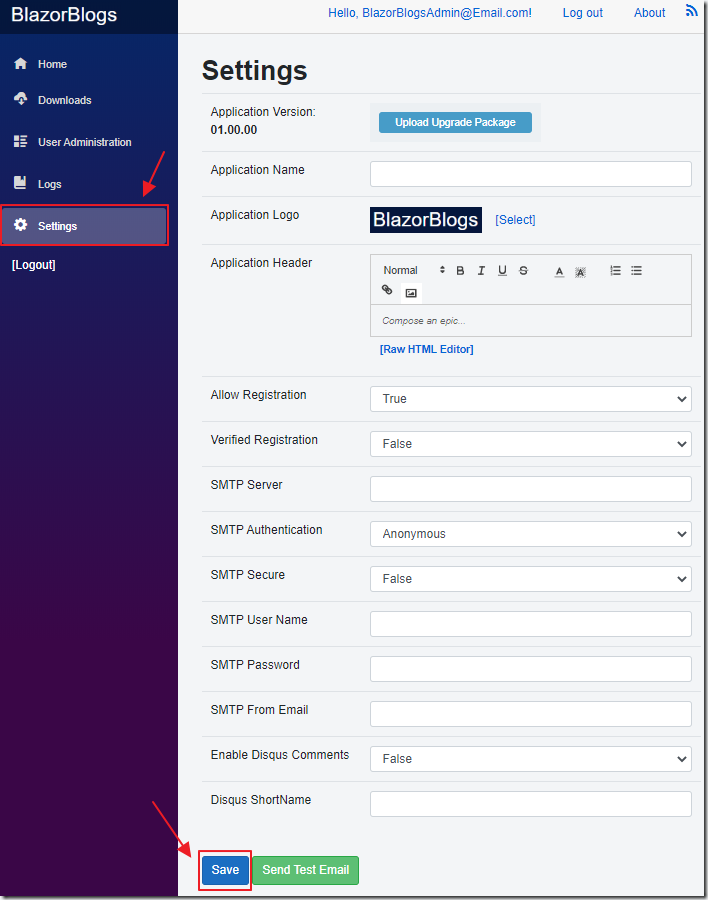
Navigate to the Settings page.
Set up options such as Allow Registration and Verified Registration.
If you have Verified Registration, you must set up the email (SMTP) settings.
To test the email settings, click Send Test Email.
For instructions on Enabling Disqus Comments (to allow users to comment on your blog posts) see: Enabling Disqus Comments In Blazor Blogs.
When complete, click the Save button to save all the settings.
Links
Installing Blazor-Blogs on Microsoft Azure (Deploy To Azure Button Method)
